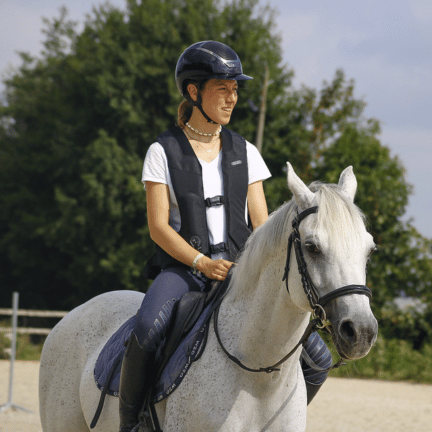
The airbag has become an essential piece of safety equipment for riders. However, to ensure optimal protection, it is important to know how to choose the most suitable model, adjust it correctly, and maintain it for long-lasting use. Here are some practical tips to help you ride safely.
1. How to choose your airbag?
When inflated, an airbag protects the vital areas of the torso: abdomen, chest, neck, and back. Some models also provide additional protection for the nape, sacrum, and coccyx.
Choosing the right airbag depends on several criteria:
- Frequency of use
- Age, particularly for younger riders
- Riding discipline
- Riding environment (indoor or outdoor)
- Budget
After narrowing down your options with these criteria, two additional factors will finalize your choice: style and comfort. Your airbag should become your ally in the saddle. Like a helmet, it should be comfortable, make you feel secure, and be something you want to wear for every ride. Your airbag should both suit your preferences and avoid hindering your movements during riding sessions.
Our team is available to help you select the model that best meets your needs and criteria.
2. How to adjust your airbag?
For optimal protection, the airbag vest must fit your body correctly, ensuring all protective areas are properly positioned.
Here’s how to adjust your airbag step by step:
- Put on the vest.
- Close all zippers or fasteners, ensuring it covers your torso from the base of your neck to your lower back.
- Check for fit: You should be able to slide a closed fist between the vest’s fasteners and your abdomen. Some models include an inner adjustment strap at the hips to refine the fit.
- Ensure even adjustments at the chest and waist to avoid overstraining certain seams.

The vest’s length is also crucial. It should not hang too low. When mounted, the airbag should neither touch the cantle of the saddle nor rest on your thighs, as this may hinder movement or cause the vest to shift upwards during the ride.
3. How to install your airbag?
To attach the saddle strap, remove your stirrup leathers. Thread each buckle of the strap through the corresponding stirrup bar. Reattach the stirrup leathers and check that the strap is securely attached to the saddle.
When riding, clip your connection strap to the saddle strap.
The connection strap, linking your airbag to the saddle strap, must be correctly adjusted for optimal deployment.
It should be taut when you stand in your stirrups.
To adjust its length, use the adjustment buckle. If the strap is too long, the airbag may deploy late during a fall. Conversely, if it is too short, it may hinder movement or trigger the airbag unintentionally.
Remember to unclip the connection strap before dismounting to avoid accidental airbag activation. The saddle strap can remain in place for repeated use with the same saddle.
4. How to store and take care of your airbag?
Between uses, store your airbag in a protective cover to prevent dust and moisture buildup. Hang it on a hanger or store it flat to avoid bending the air chamber.
It's also advisable to clean it regularly with a soft, moistened brush or sponge and a little soapy water to prevent any stains from embedding themselves deep into the fabric. Leave to air dry, preferably on a hanger.
Warning: the airbag must never be immersed in water, put in the washing machine or tumble dryer, or even ironed. This could damage metal components and internal membrane, and alter the airbag’s effectiveness.
5. How to re-arm your airbag?
After deployment, inspect the airbag for any damage to the fabric or activation mechanism. A small amount of air will escape a few seconds after a fall as the airbag begins to deflate. To fully deflate it, lay the airbag flat on a clean surface.
Re-arming the airbag requires replacing the cartridge. Although procedures vary by brand, the general steps are:
- Unscrew the used gas cartridge counterclockwise.
- Fully deflate the airbag by pressing on each chamber, working from the end of the cushion toward the cartridge. Avoid folding or rolling it.
- Tuck the air chambers inside and close any buttons or Velcro strips as per the model’s design.
- Insert the screw (provided in the re-arming kit) into the hole beneath the activation unit and hand-tighten it.
- Finish tightening with the Allen key until the receptacle is lowered enough to insert the key ball.
- Insert the key ball into the receptacle and position the cable downward.
- Lower the red ring (if present) or hold the key ball while unscrewing and removing the screw with the Allen key.
- Raise the red ring to its default position and attach a new gas cartridge.
If you have questions about the re-arming process, our team is available to assist you.
6. Cartridge compatibility
Cartridges are specifically designed for use with airbags of the same brand and are not interchangeable. Using cartridges from other brands or generic cartridges may damage the activation mechanism and compromise the airbag’s deployment.
Using an incompatible cartridge also voids the warranty provided by most brands in case of technical issues or airbag deterioration.
For your safety, always use cartridges of the same brand and appropriate weight for your airbag model.
Our team of experts is here to guide you in choosing your equipment and answering any questions. Your satisfaction is our priority.
